week 23: a sealed envelope

bi-folding doors installed

The last of the doors and windows are fitted to the extension area. The last of these units to be fitted was the bi-folding doors on the lower ground floor. With some of the scaffolding out of the way temporarily (to allow the balcony to be built), we are able to see what the house will look like.

More importantly, we are now able to start proper drying-out. A de-humidifier and a heater are now set-up and the space is now heated!

week 23: new garage roof

Garage roof stripped photo of complete roof to go here

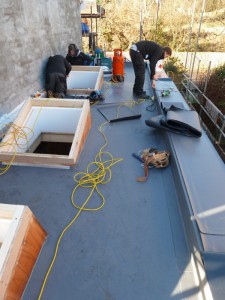
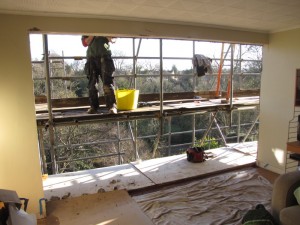
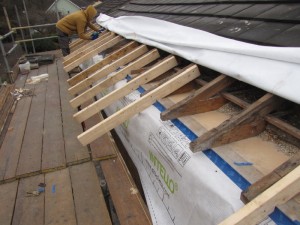
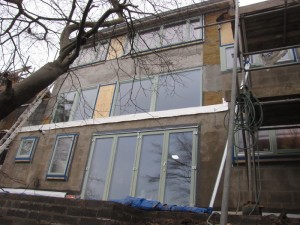
The old garage roof covering had reached the end of its useful life sometime ago. Although not part of the thermal retrofit, we needed to replace it to allow the external wall insulation to be fitted onto the gable wall as shown below.

garage roof

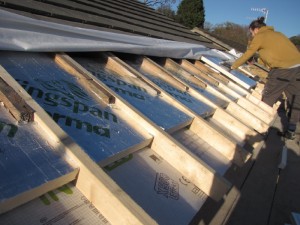
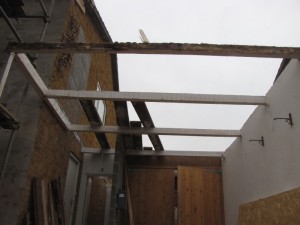
The existing corrugated sheets are being replaced with a single ply deck. However, the existing structure only has joists at 1300mm centres, whereas they should be more like 600mm centres. The guys set them selves a target of removing the old roof, reinforcing the structure (including the replacement of some rotten joists) and getting the ply deck down in one day. Seems a tall order, but after a long, hard day, they manage it.

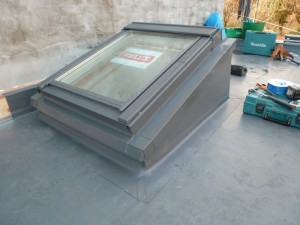
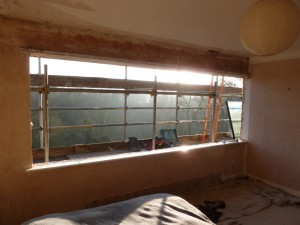
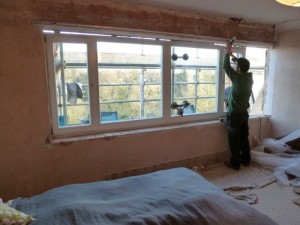
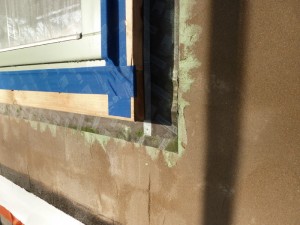
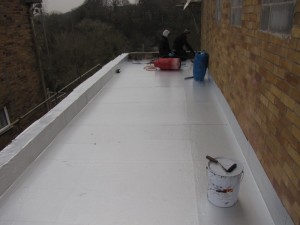
The new roof has the same Cefil membrane as our extension roof on the other side of the house (see earlier post). This is applied the following day and we’re back in the dry. Now, once we protect our nice new roof, we can get the scaffolding back so that we can render and insulate the gable wall above.

week 22: early results on cavity wall insulation

December (Pre- Cavity Wall Insulation)  January (Post Cavity Wall Insulation)

At the beginning of December, not long before the cavity wall insulation was injected, I took the opportunity to take some thermal images of the house. As the image above left shows, we had a significant amount of heat loss through the cavity. Warm air (shown yellow/ green) was entering the cavity and escaping at high level.

I carried out another survey earlier this week (cavity wall insulation has now been injected – see earlier post). The image above right shows the same north gable wall. There are no yellow/green areas at all, which suggests that the cavity fill has significantly reduced the air movement within the cavity. This is the primary purpose for the cavity fill, otherwise the external wall insulation (to be fitted shortly) will be less effective.

The area highlighted by a red arrow indicates an area of higher heat loss at the front of the house (you may need to click on the image to enlarge it). This area is a small solid wall section and again illustrates the the effectiveness of the cavity wall insulation elsewhere. More images to analyse and post later.

One final thing for now on cavity wall… we had the opportunity to look into the cavity again as we are changing the aperture of one of the windows. The ecobead insulation again beats my expectations and has completely filled the entire cavity:

Existing kitchen window

week 21: setting a new standard for flat roofs?

In my professional capacity, I do a lot of roof surveys, particularly roof failures on flat roofs. But, rarely have I actually specified one. So, I was naturally concerned that the flat roof design should be a good performer and wanted a good quality polymer waterproof layer (not the usual asphalt). Our contractor recommended Poole Single Ply Roofing Systems who use and install  Cefil UK membranes. Having seen a small sample and had a talk with the installers, I decide to go along with their enthusiastic recommendation.

Roof membrane applied  velux roof window

Installed on top of 150mm Kingspan TR26 insulation, the grey Cefil membrane is installed in a true craftsmanship style. It takes a little longer to install than I expected it would, but realise much of this additional time is due to the attention to detail around the Velux window up-stands and over the parapet. The final proof will be when the roof is complete, but if all flat roofs looked as good as this, I know that my defect survey bookings would be down! As the owner of this new roof, I have to say that this is a more re-assuring scenario.

This roof membrane will continue across our rear extension/balcony area and will replace the existing garage roof.

week 21: a placeholder

Due to upgrade problems since just before Christmas, the recent entries you have read have been back-posted (actually I’m not sure what the correct time-related adjective is for this). But we’re now in the present. Week 21 following week 18 is deliberate and skips weeks 19 and 20 as the site was shut for two weeks over Christmas.

From a programme viewpoint we are behind. This has a lot to due with the wet and cold weather and a bit of over-optimism by our contractor as far as the original programme was concerned. I think the construction phase will last until around week 30.

Continue to enjoy and please continue to post your comments: more and more coming through. I am also pleased (and shocked) to see that this site now has some 38,000 hits from over 1000 individual visitors – thanks for your interest.

Happy geeking

Ian

week 18: new heating and hot water system

Heating at last

Working very long days, our heating engineer has now got the new heating and hot water system commissioned. We are re-using our existing, relocated boiler, but this causes some last minute problems – it doesn’t fire. After sinking some new parts into it, we finally get it going again. The house took quite a few days to heat up – the new radiator sizes are tiny – sized to cope with the proposed thermal specification of the house, which is a little way off yet. But we’re warm and dry: perhaps not energy efficient yet, but as the heating has been off for the whole heating season so far, we’ll care more about efficiency at a later time – right now, it’s the warm that matters.

The hot water system is an OSO Twin Coil cylinder. At present it is indirectly fed from the boiler only – the solar collectors will follow when the budget allows!  The heating is served by three zones: one per floor, i.e. each floor can call the boiler for heat – they don’t have to be heated to the same temperature at the same time.

The photo shows the cylinder and valve station just prior to wiring/commissioning. There is more to do: remove temporary pipework; install insulation on new pipework; install lower ground floor heating. More to follow on this installation.

week 18: new window installation begins

Living room window removed  Bedroom window removed

At last, the new triple-glazed windows are being fitted. The old windows are removed, temporarily exposing the house to the elements. A timber frame surround is constructed around the structural opening as we are moving the new windows forward of the existing elevation. This is to allow them to be installed within the external insulation layer, thereby reducing thermal bridges.

Bedroom window fitting  window detail

The windows are fixed into the new surrounds and then taped to form the air seal using Tescon tape. The timber surround is taped to the masonry wall using Contega EXO tape and Orcon F sealant. However, because a lot of this work has happened in between wet and cold weather, adhesion has not been optimum. We have therefore taken the additional precaution of applying a second render base coat on top of the Contega tape.

week 17 and 18: existing roof extended

rafter extension

The rafters to the existing pitched roof have been extended now that the concrete gutters have been removed. This will allow the roof to extend sufficiently in front of the external wall insulation. The Intello air barrier membrane beneath the rafters is Tescon taped to the existing timber wall plate to reduce the air leakage out of the cavity head (see drawing in previous post).

rafter insulation

We are also insulating between the rafters to provide insulation continuity between the external wall insulation and the loft insulation. The rigid insulation panels are squeezed tightly between the timbers and extend approx 0.5m above the (future) loft insulation. This means that they should also serve to provide a ventilation channel into the loft. This ventilation is necessary to remove any condensation from the cold loft space, and is often provided via proprietary ventilation channels.

New, matching roof tiles have been sourced. These will soon be fitted along with the new fascia and gutters – to be continued.

week 17 and 18: extension roof progresses

vapour barrier being laid

The vapour control layer to the new extension roof is now laid. The roof will be a warm roof construction, so the insulation will sit on top of the vapour control, followed by the final waterproof membrane. Before that, the roof light kerbs are cut in. The studio space below the roof will need very good natural daylight and we can’t fit windows along the long (party) wall. So, we are fitting three large roof lights instead.

rooflight kerb

The kerbs are flat pack units from Velux. Whilst they are fine for accommodating the Velux window units, they are not as well insulated as I would have expected. We will need to review the abutment of the kerb with roof insulation to see how we can add/improve the performance.