week 27: external wall insulation

External wall insulation

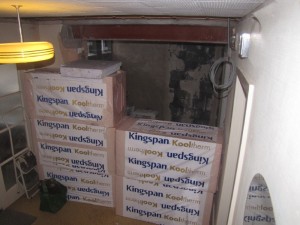
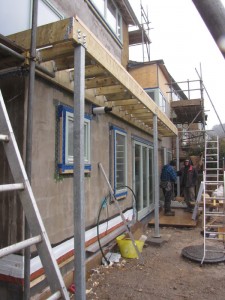
Having been delivered some 6 weeks ago (see earlier post), the external wall insulation is now starting to go on. Starting with the extension late last week, but in earnest this week to (almost) complete some 80m² of wall area. The main (original) house is left to do, it should be done in approximately 3 weeks time if we manage to keep this pace up.

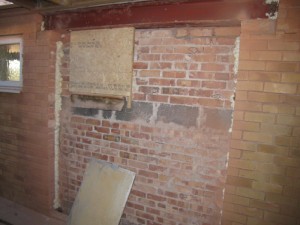
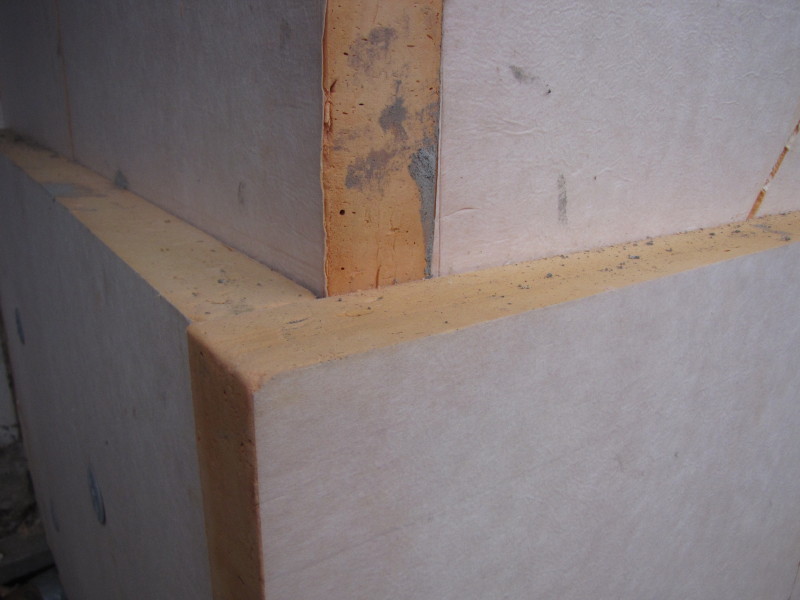
We are using two layers of Kingspan K5 insulation boards. These are 60mm thick giving a total of 120mm external insulation. The first board gets bonded to the wall using Knauf Marmorit SM700. After this has gone off, the second insulation layer is applied with the boards offset in order to cover any air gaps between boards in the first layer. This second layer is mechanically fixed using thermally-broken fixings through both boards and into the masonry.

EWI - new kitchen  EWI - side wall

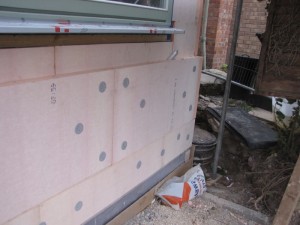
The wall insulation will eventually be finished with a mix of through-colour render and splayed chestnut timber cladding. In the meantime the house will look like a marshmallow!

week 27: breakthrough

Breakthrough prepraration

Finally…the breakthrough from our hall into the extension happened earlier this week. The preparation for this took place some weeks ago with the insertion of the steel and the removal of the outer brick leaf as the photo above shows. I had some great pictures of this weeks breakthrough happening, but my SD card was destroyed when I tried to transfer the pictures – lost forever! I have used an earlier ‘before’ shot below alongside the breakthrough shot…

just moved in (hall)  Breakthrough

A better picture of the breakthrough will replace the photo (above right). And, yes, I know it’s an odd place to put insulation, but until the stairs are in (next week), we need to keep our inquisitive dog out of the way.

week 26: balcony taking shape

balcony and support posts   balcony construction

The construction of the balcony is well under way. The design is for a ground supported type, rather than a cantilever that we thought we might have. But we have managed to limit to three support columns, which is fine – a feature perhaps. Balconies are a real problem when it comes to thermal bridging. There are a number of proprietary thermal break products that you can now get for cantilever balconies providing the deck is steel, or concrete. But for a little timber addition to our extension roof, it was proving a little over-complicated to do a cantilever option, whilst at the same time not over-compromising the thermal integrity of the building.

The ground supported solution is an independent structure, but still compromises the thermal envelope slightly as it needs to be brace back to the building. The top left picture shows, the timber ledger used to brace to the building. This is 60mm (thick) timber, so takes the place of one layer of external wall insulation. It will still have one layer of 60mm insulation over the top. However, this increases the U-value in the area of the ledger brace from 0.14 W/m².k (for the rest of the extension walls) to 0.19 W/m².k. This is fairly minor overall, and would be worried if we were after EnerPHit certification – but we’re not. Interested if anyone else has had similar dilemmas?

week 26: first air leakage test

Air leakage test No.1Photo: Tom Morris

I carried out the first air leakage pre-test this week. Our target for the extension area is 1.5 m³.h/m². The primary air barrier on this project is on the outside of the masonry, i.e. just behind the external wall insulation, which will be applied shortly. So, we decide to do an initial test to see if there are underlying issues prior to covering everything up.

cable grommet flue grommet

The base render coat acts as the main air barrier, so anything coming through this must be sealed. Cables and the boiler flue are provided with grommets, providing a good seal around these penetrations. The windows have been sealed with tape (see earlier post) around the outside, but the internal sealing hasn’t been done yet.

So to the result… we get a pretty good 2.7 m³.h/m². Leakage detection identifies a significant amount of leakage around the internal openings to the existing house, which were temporarily sealed, so this needs improvement prior to the next test. There is a small amount of leakage around the windows, due mostly to the incompleteness of the inner seal, and a little through the drains (not filled with water yet). Also, our secondary air barrier, internal plaster, hasn’t been done yet. But all in all this isn’t bad, and believe we’re on track for meeting our target of 1.5 m³.h/m².

weeks 24 and 25: boarding out and screeding

LGF Dry lining  LGF dry lining

LGF dry lining

The internals are now starting to transform the space from being a building site. The extension area at both the lower ground level and ground level is now being boarded out. The ceiling boarding is magnesium silicate by Multi-Pro. This is a moisture resistant board and has a greater breath-ability than plasterboard. The external walls will be plastered, but we have used 62.5mm Kingspan K17 insulated plasterboard on the internal walls (external prior to extension) that have been underpinned.

The floor insulation has also been laid. Again, we have used Kingspan K3 floorboard. This is 100mm thick, and achieves a U-value of 0.13 W/m².K. The insulation is laid directly onto the sub slab and covered with polythene ready for the screed. The screed arrived today on a mixer lorry. We are using a liquid flow screed, which allows a thinner layer (30mm) compared to traditional sand/cement screed (65mm). I’ve not used this type before, so will be interested to see how successful it is.

Tarma pre-mix lorry doing its stuff screed flowing in