
I received a request for further information about how we fitted the windows to minimise thermal bridges. So here goes:
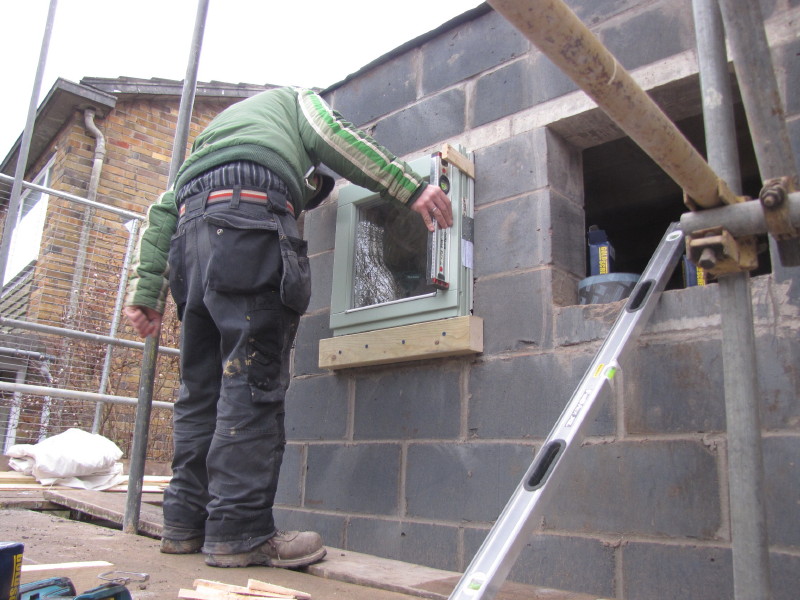
Each window unit has been fitted into an external structural timber frame, or sub-frame. The sub-frame is standard C16 grade timber and doesn’t need to be tanalised as it shouldn’t become wet within the insulation layer. The size of the timbers in this case were chosen to be 60mm deep for reasons outlined below. The first timber fitted is the sill piece to act as a ledger to support the window during positioning and alignment. The window unit is fixed back to the masonry using nail plates, but most of the weight of the window is on this ledger, so it must be a good fix. The other three sides of the sub-frame can then be fitted snugly around the window:

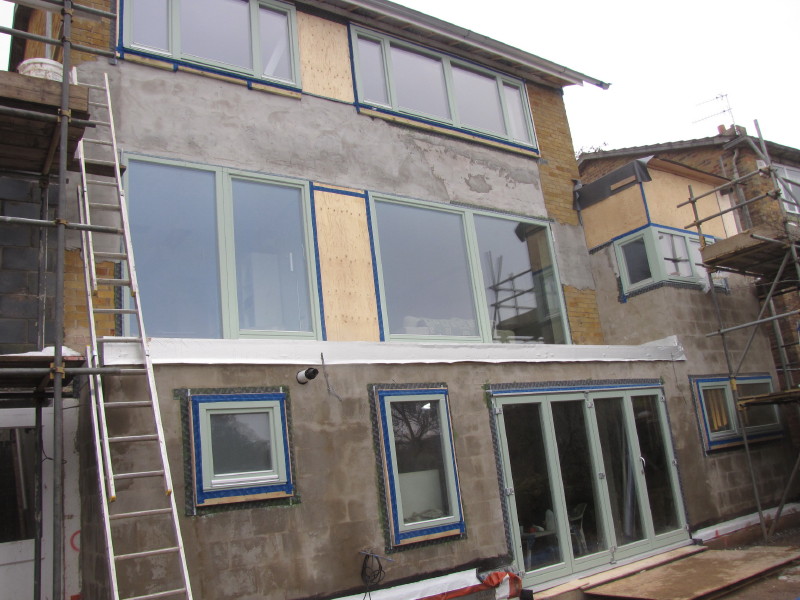
In our case, the surrounding masonry was treated with a slurry (sand/cement) render base coat, to act as the primary air barrier. So, once the windows were fitted and the render had dried, we could deal with the airtightness sealing – sealing the window to the sub-frame and the sub-frame to the wall, using proprietary air sealing tapes. In hindsight we made an minor error here. We should have taped the sub-frame to the masonry and then rendered over the top of the render layer tape (black tape).
We chose 60mm deep sub-frame because we were using 2 x 60mm layers of insulation. The thickness of the window frame is 78mm. So the idea was to have the first layer of insulation run into the side of the sub-frame and the second layer would fly across the face of the window frame by around 40mm as shown:
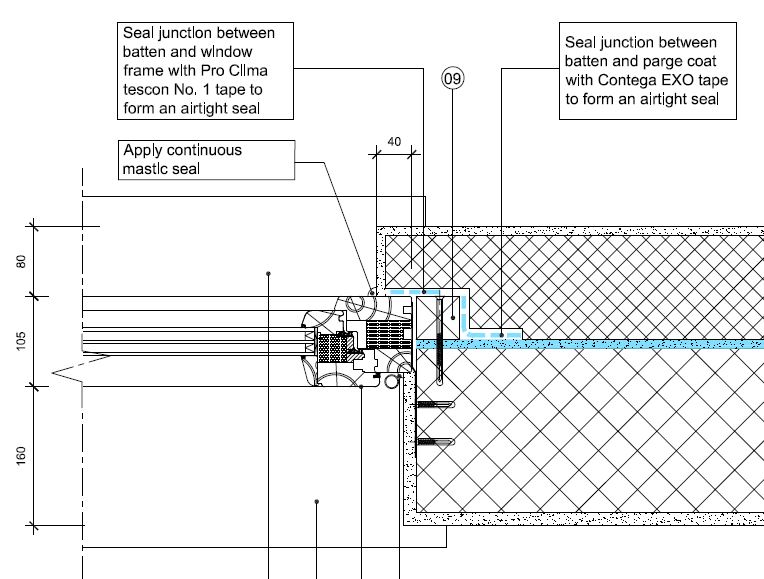
Again, with hindsight, we should have used sightly deeper timber for the sub-frame (say 70-75mm) to account for the 10-15mm adhesive layer for the first insulation sheet. This would have saved a bit of ‘shaving’ on the second layer, which, of course is a slight thermal compromise too.
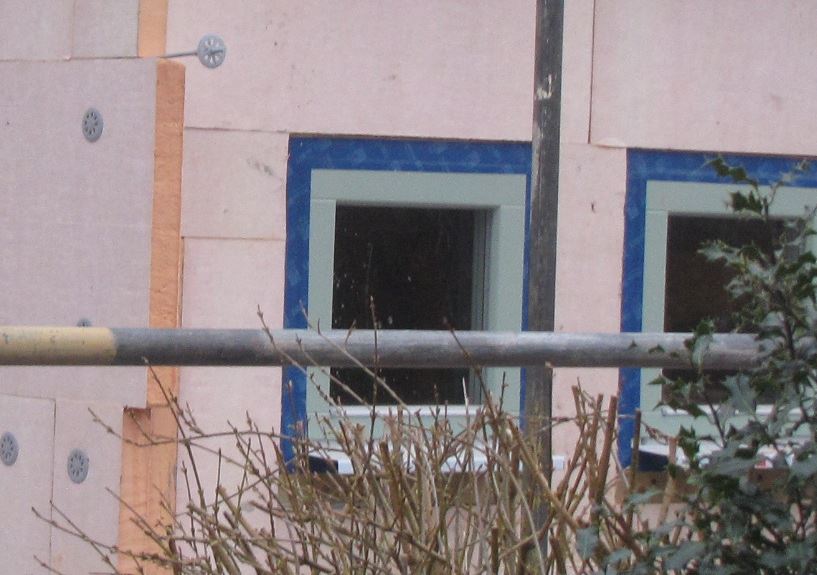
The picture below shows the first layer of insulation running into the sub-frame.
I believe the principle we have adopted is one of the best ways of minimising thermal bridges between the window frame and the surrounding masonry. We could have gone one step further and used a structural insulation material for the sub-frame, such as CompaCFoam, manufactured in Austria, but I was put off a bit by the costs (around 10x cost of timber), and, as we haven’t gone for ultra-high spec, thermal break window frames (£££), I didn’t think it was a worthwhile investment in this case (investment greater than energy saving). But, it’s worth a look.
Hope this helps and would be interested to hear if others have adopted a different approach.
Hi, Very useful information. We are starting our retrofit tomorrow with the windows (currently sat in the back garden) being fitted in this very method including the various airtightness tapes. Our windows are a little deeper, as is the insulation layer so we will end up with a similar detail. Nice to know some else was happy with this approach. We are also following a similar strategy in that we are aiming for a large reduction in energy usage without aiming to hit a standard although the overall effect should be in the EnerPhit/Passivhaus area. We are also using windows at 0.88 U value.
Thanks Tim. Glad the postings are still of interest. I will have time over Christmas to get some more up to date postings for the results of our ongoing monitoring. The house is performing better than we expected at this stage, both in energy and comfort terms. Good luck with your retrofit: thought of starting a blog?
Look forward to seeing some more results
Looking to share some info via some in progress visits for those local and some form of blog.
cheers
Tim
Thanks. Watch this space…
Very interested in the detail current upgrading the 1960s extension on the rear of our house with 80mm external wall insulation and was worried about the recessed nature of the windows on the average retro fit and potential cold bridging.
The way shown above seems inevitable sensible , although I am a little concerned on the loading of the timber, the windows you show above are relatively small and thus this approach would seem great. However would the approach work when putting greater loading on the head ? Ie with a bifold door or large top hung window.
The question in a rambling way does this technique work with Bifold doors and did you use the same detailing in this application ? (I think I can see bifold door in the above photos)
Simon Crossley