week 17 and 18: base render coat

Extension wall slurry coat  Existing wall slurry coat

The base render, or slurry coat to the existing walls and extension walls has now commenced. As well as providing a smooth substrate for the external wall insulation, this render coat also serves as our primary air barrier, highighted in blue in the section below.

wall section

Working between sub-zero temperatures (before Christmas) and the rain, the rendering is still ongoing, but having done the front of the property, our house is starting to take on a different look…

house metamorphosing

week 14: blockwork complete


With the scaffolding up, we were able to complete the blockwork walls this week. Despite the rain, the walls have still gone up quickly, albeit there has been a bit of extra re-pointing here and there to keep on top of the rain as it has washed the mortar away! The walls run to roof parapet height and will be externally insulated with the insulation continuing across the top of the parapet as shown in the detail below.

The insulation will start shortly, but in the meantime the priority is the internal floor followed by the roof so that we can get out of this mad weather as soon as possible!


week 13: what a difference a week makes

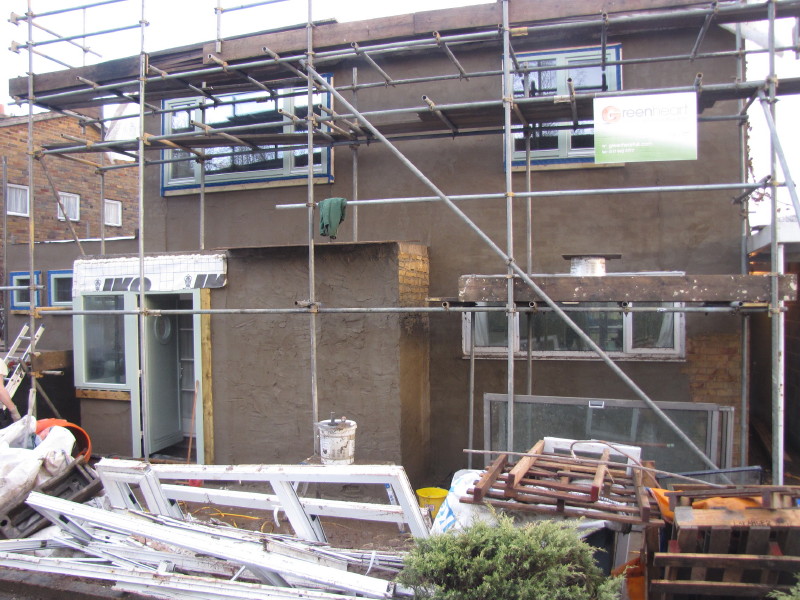
They say most the work is in the preparation, and this has been proven this week. The walls for the extension have gone up at an astonishing rate. Even greater progress would have been made if the scaffolders came back when they said they would! Even so, we’re now only approximately 6-7 block courses away from complete construction of the walls.

Internally, the space looks cavernous, but once the internal floor is in it will shrink again. The above photo shows the pantry being constructed, with the retaining wall behind. The internal stairs will be in the space to the left of the pantry wall.


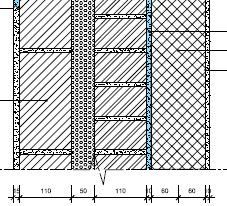
The lintels for the rear wall arrived this week and were installed the same day. Two of the four openings are large: sliding/folding doors (3.2m) and the kitchen window (2.3m). These are special lintels and need to be made to order. The rear wall masonry is now complete. The drawing extract above right shows the openings on the rear (please note: some feedback to this blog is that photos/drawings are small –  you can click on any image to enlarge it).

week 13: other odd jobs


The rear windows to the garage and original dining room store have been removed in blocked up. The dining room store was outside of the thermal envelope of the house, completely uninsulated floor, roof and walls – a real cold spot. The final house will not be short of storage space, but we decided that it would be useful to have some utility storage accessed from the garage. This decision also helps with awkward thermal detailing – i.e. we don’t need to incorporate the store within our thermal envelope. That said, and having just noticed on the photo as I am posting this, I realise that we haven’t incorporated the external wall insulation between this block infil and the existing house walls. A thermal bridge to deal with – any ideas? Ruairi?

week 12: rear wall construction

The rear wall was constructed this week up to lintel level. Seeing it built, we realise there’s not much of it really, due mostly to the large folding doors that will be fitted in the dining room. So it only takes a day to build. The rest of the week has been taken up with tanking and below ground insulation (see previous post), land and surface water drainage works and preparation for the front wall.

The front wall foundations were cast on Friday – the last of the foundation works! The scaffolders arrived yesterday (Saturday) and erected the scaffolding to the side and rear of the extension. This will allow the extension walls to be built up next week.