weeks 35 and 36: barge boards

old and new

When the rendering was done, the house looked clean and new. However, as we are keeping the existing roof, the original concrete barge caps made it all look a little drab at roof level. We came up with a solution to encapsulate the entire edge with a timber barge board that would fix into the existing concrete roof. It seems to have done the trick. The new barge boards tie-in with the new fascias for the guttering along the eaves and all of this timber edging to the roof will be painted the same colour as the windows.

bargeboard fitting


weeks 33 and 34: utility room floor

Spacetherm installed  Spacetherm

Our utility room on the lower ground floor is the only part of the original floor slab that we didn’t lower as we didn’t see the benefit of all the disruption involved with such an intervention. The disadvantage though is that we have less opportunity to insulate it to the high standard that we have for the new floor (see earlier post). We are at least able to increase the floor by a maximum of 40mm in order to meet the level of the new (higher section) floor and have specified spacetherm. This is a very thin insulation blanket, which is bonded to chipboard. We opt for 20mm thickness of spacetherm (+18mm chipboard), which gives us the make-up we need. The spacetherm is highly efficient, with an exceptionally low conductivity of 0.013 W/m.K, which impoves the U-value of the floor from the original 0.72 W/m².K down to an acceptable 0.26 W/m².K (approximately the standard required for houses built to 2010 Part L Building Regulations)

weeks 33 and 34: electrical installation

Sub-meters  Consumer units

To facilitate the future energy monitoring of the house, I asked our electrician to install sub-meters on all our circuits, e.g. lighting, general sockets, kitchen sockets, cooker, immersion, etc. These have now been installed and will be connected to the data logging equipment when that gets delivered in a few weeks time.

I also intend to connect the incoming gas and electricity meters to the logging equipment, but we need to upgrade our existing meters to modern ones with a pulsed output. Trying to explain this to the utilities companies is a bit like trying to explain the mere concept of climate change to George W. Bush. Even when I am prepared to pay for a meter upgrade, they won’t do it. I am investigating ways of doing this still (by speaking to the right meter operator), but if it comes to it I will fit my own meters on the customer side of the existing meter – seems crazy though. More on this topic will follow…

weeks 30 to 32: plastering and rendering

External base render - front

Yes, I know I’ve taken a break from updating this blog for two or three weeks, but things have been a tad busy with work, so apologies for that.

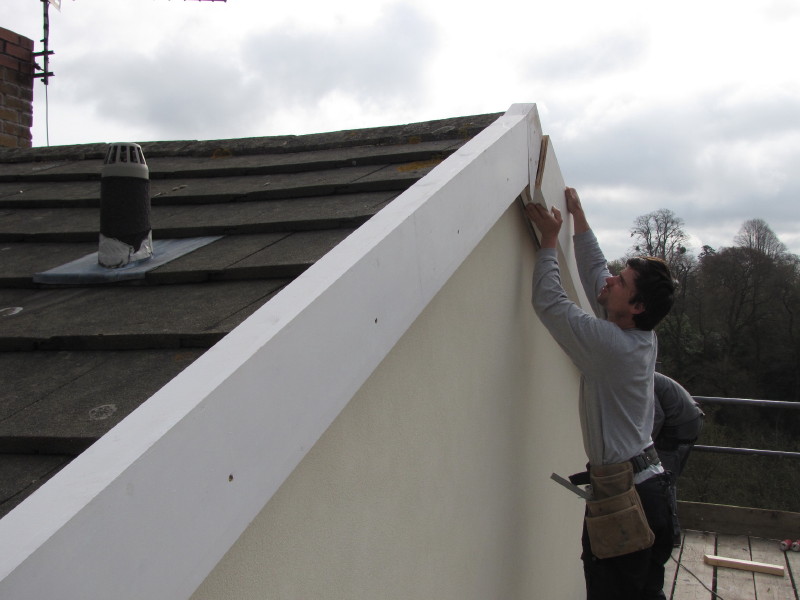
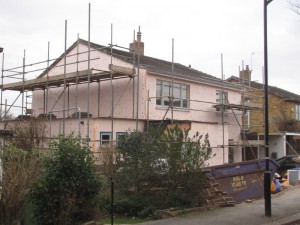
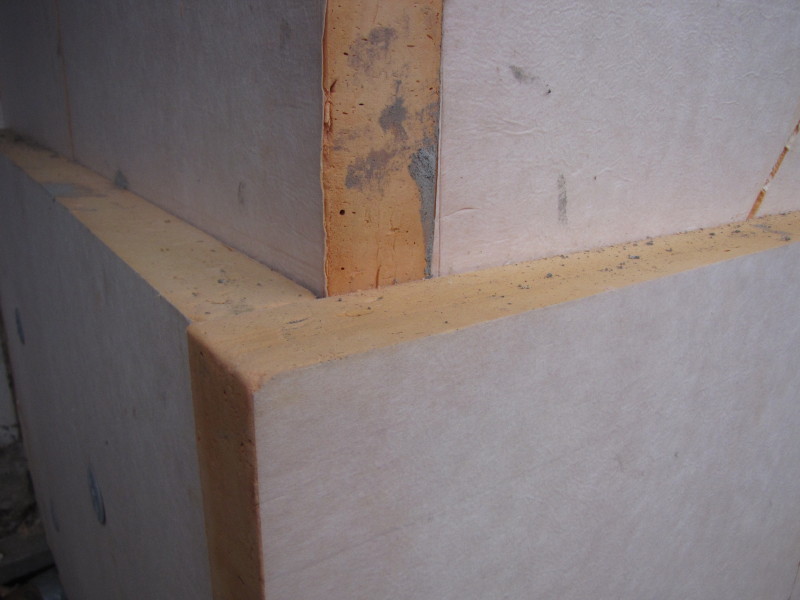
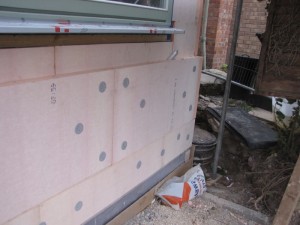
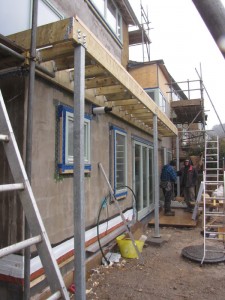
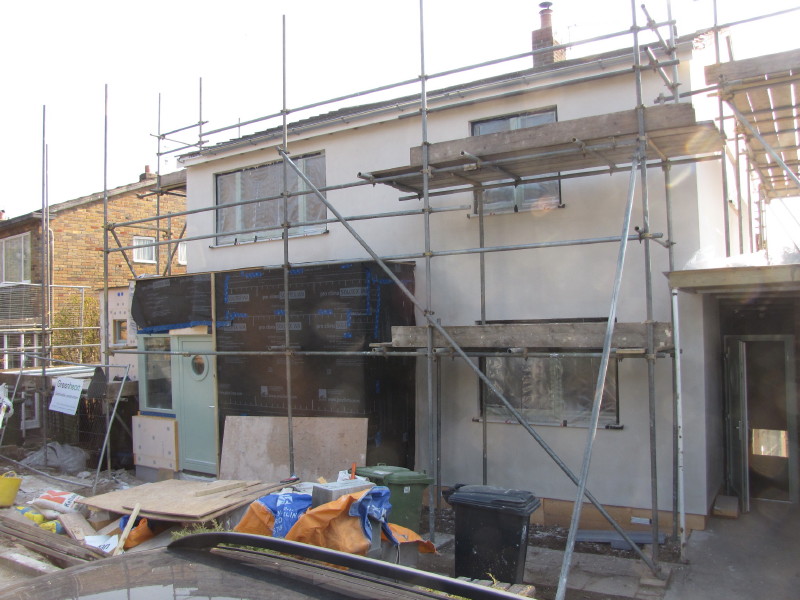
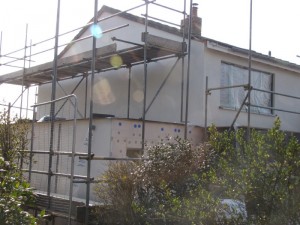
A lot has happened since the last update. Most of this has been on the internal plastering and the external rendering. Externally, the house and extension have now been rendered with two coats + mesh of Parex render base. The top coat – a through colour layer will be added next week, although the colour is only a shade different to the base layer. As we have insulation down to ground level, the render will continue below the drip profile rail, but this will be after the scaffolding has been removed. So far it looks good. The area around the front door (covered in a black wind check barrier) will be clad in sweet chestnut, which should also be added starting next week.

External base render - side

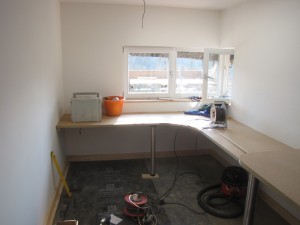
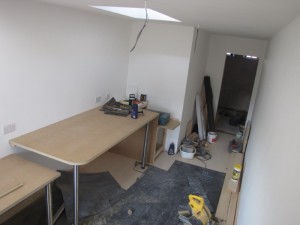
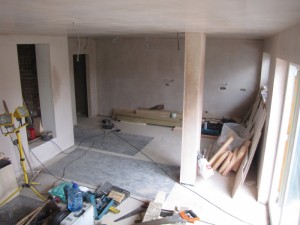
Plastering has gone really well. We have used a local plasterer, recommended by our builder, and the quality of his work and pace is quite exceptional. In the three weeks since the last blog post, he has managed to plaster the entire extension area + a bit of extra work in the existing house.

Kitchen_diner plastered Stairwell plastered

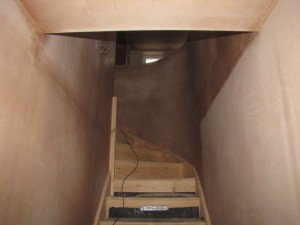
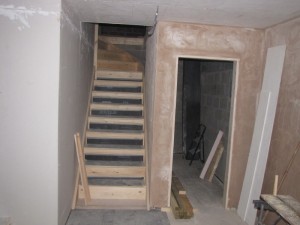
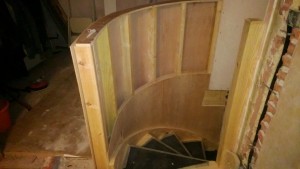
The photo above right shows the staircase now installed. This was also put in during the last three weeks and it looks great – it is a softwood stair with a curve formed for the turn at the top – the joiner has done a beautiful job, which is complemented by a curved wall, plastered to perfection.


weeks 28 and 29: more progress on external wall insulation

Fron of house EWI

The external insulation progressed well (until we ran out) and the house is beginning to be transformed. I’m sure we’re the talk of the neighbourhood – ‘what on earth are they doing?’ Weather permitting, the rendering will start next week. and it will begin to look a bit more normal.

North Front EWI

Another week, or so and the insulation should be complete on the external – a fair bit to do on internal insulation works – particularly suspended floor and loft.

weeks 28-29: staircase goes in

Stairs from bottom Stairs from top

The new staircase was installed over the last couple of weeks. We were keen to have a curve on the turn on the stairs at the top and the joiner has made a lovely job of it. As the photo top left shows, the carpenters have started to build a curved wall from the hall to wrap around the stairs. Access to our new extension at last – feels like we are getting nearer to the end of the build now!

week 27: external wall insulation

External wall insulation

Having been delivered some 6 weeks ago (see earlier post), the external wall insulation is now starting to go on. Starting with the extension late last week, but in earnest this week to (almost) complete some 80m² of wall area. The main (original) house is left to do, it should be done in approximately 3 weeks time if we manage to keep this pace up.

We are using two layers of Kingspan K5 insulation boards. These are 60mm thick giving a total of 120mm external insulation. The first board gets bonded to the wall using Knauf Marmorit SM700. After this has gone off, the second insulation layer is applied with the boards offset in order to cover any air gaps between boards in the first layer. This second layer is mechanically fixed using thermally-broken fixings through both boards and into the masonry.

EWI - new kitchen  EWI - side wall

The wall insulation will eventually be finished with a mix of through-colour render and splayed chestnut timber cladding. In the meantime the house will look like a marshmallow!

week 27: breakthrough

Breakthrough prepraration

Finally…the breakthrough from our hall into the extension happened earlier this week. The preparation for this took place some weeks ago with the insertion of the steel and the removal of the outer brick leaf as the photo above shows. I had some great pictures of this weeks breakthrough happening, but my SD card was destroyed when I tried to transfer the pictures – lost forever! I have used an earlier ‘before’ shot below alongside the breakthrough shot…

just moved in (hall)  Breakthrough

A better picture of the breakthrough will replace the photo (above right). And, yes, I know it’s an odd place to put insulation, but until the stairs are in (next week), we need to keep our inquisitive dog out of the way.

week 26: balcony taking shape

balcony and support posts   balcony construction

The construction of the balcony is well under way. The design is for a ground supported type, rather than a cantilever that we thought we might have. But we have managed to limit to three support columns, which is fine – a feature perhaps. Balconies are a real problem when it comes to thermal bridging. There are a number of proprietary thermal break products that you can now get for cantilever balconies providing the deck is steel, or concrete. But for a little timber addition to our extension roof, it was proving a little over-complicated to do a cantilever option, whilst at the same time not over-compromising the thermal integrity of the building.

The ground supported solution is an independent structure, but still compromises the thermal envelope slightly as it needs to be brace back to the building. The top left picture shows, the timber ledger used to brace to the building. This is 60mm (thick) timber, so takes the place of one layer of external wall insulation. It will still have one layer of 60mm insulation over the top. However, this increases the U-value in the area of the ledger brace from 0.14 W/m².k (for the rest of the extension walls) to 0.19 W/m².k. This is fairly minor overall, and would be worried if we were after EnerPHit certification – but we’re not. Interested if anyone else has had similar dilemmas?